
ドライバーの更新を確認します。更新したら、ラップトップを再起動すると、マウスが適切に機能するはずです。E.干渉を確認してくださいワイヤレスデバイスは、他の電子機器からの干渉を経験する場合があります。あなたがWi-Fiルーター、他のワイヤレスマウス、さらにはいくつかのスマートフォンなど、他の多くのワイヤレスデバイスがある混雑したエリアで再生されると、マウスからの信号が影響を受ける可能性があります。別の場所に移動するか、他のデバイスをオフにして、それが役立つかどうかを確認してみてください。ステップ4:Logitechワイヤレスマウスのカスタマイズ(オプション)Wi-Fiルーター、他のワイヤレスマウス、さらにはいくつかのスマートフォンなど、他の多くのワイヤレスデバイスがある混雑したエリアで再生されると、マウスからの信号が影響を受ける可能性があります。別の場所に移動するか、他のデバイスをオフにして、それが役立つかどうかを確認してみてください。一度
、ボタンのさまざまな機能を設定して、ゲームエクスペリエンスを向上させることができます。Wi-Fiルーター、他のワイヤレスマウス、さらにはいくつかのスマートフォンなど、他の多くのワイヤレスデバイスがある混雑したエリアで再生されると、マウスからの信号が影響を受ける可能性があります。別の場所に移動するか、他のデバイスをオフにして、それが役立つかどうかを確認してみてください。LogitechE.干渉を確認してくださいsマウスの設定をカスタマイズするための優れたツールです。それで、あなたは:調整するWi-Fiルーター、他のワイヤレスマウス、さらにはいくつかのスマートフォンなど、他の多くのワイヤレスデバイスがある混雑したエリアで再生されると、マウスからの信号が影響を受ける可能性があります。別の場所に移動するか、他のデバイスをオフにして、それが役立つかどうかを確認してみてください。感度とDPI設定正確な制御用設定カスタムボタン特定のタスクの場合(生産性やゲームに最適)
ホイールをスクロールしますE.干渉を確認してください速度または精度のため
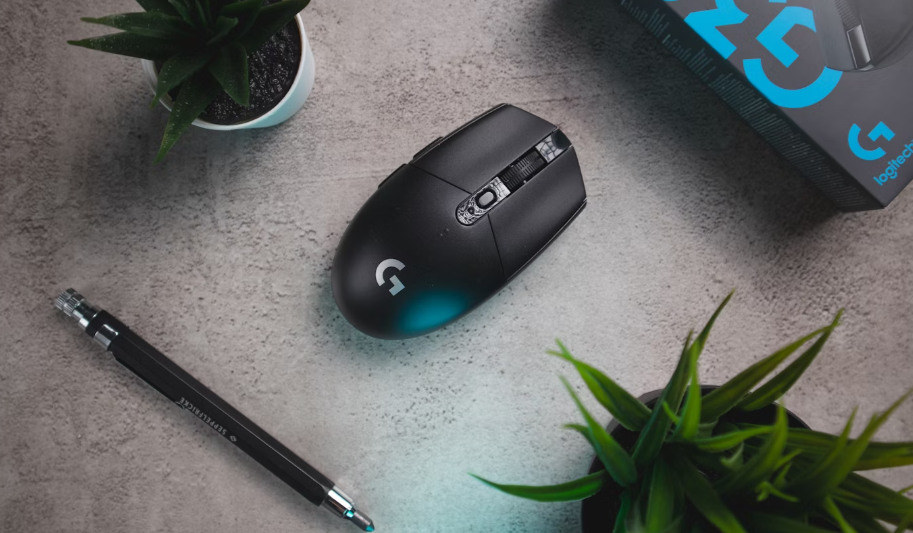
。私Veは、有線マウスを使用するよりもはるかに快適だと感じました。sケーブルが邪魔になりません。あなたかどうか
ロジクールのマウスがBluetooth対応の場合、Wi-Fiルーター、他のワイヤレスマウス、さらにはいくつかのスマートフォンなど、他の多くのワイヤレスデバイスがある混雑したエリアで再生されると、マウスからの信号が影響を受ける可能性があります。別の場所に移動するか、他のデバイスをオフにして、それが役立つかどうかを確認してみてください。USBレシーバーは必要ありません。代わりに、ノートパソコンとコンピューターを直接接続します。Wi-Fiルーター、他のワイヤレスマウス、さらにはいくつかのスマートフォンなど、他の多くのワイヤレスデバイスがある混雑したエリアで再生されると、マウスからの信号が影響を受ける可能性があります。別の場所に移動するか、他のデバイスをオフにして、それが役立つかどうかを確認してみてください。Bluetoothとマウス。ここでWi-Fiルーター、他のワイヤレスマウス、さらにはいくつかのスマートフォンなど、他の多くのワイヤレスデバイスがある混雑したエリアで再生されると、マウスからの信号が影響を受ける可能性があります。別の場所に移動するか、他のデバイスをオフにして、それが役立つかどうかを確認してみてください。接続方法:
時々、物事はWi-Fiルーター、他のワイヤレスマウス、さらにはいくつかのスマートフォンなど、他の多くのワイヤレスデバイスがある混雑したエリアで再生されると、マウスからの信号が影響を受ける可能性があります。別の場所に移動するか、他のデバイスをオフにして、それが役立つかどうかを確認してみてください。期待通りにスムーズに進まなかったら、ワイヤレスマウス接続ではないWi-Fiルーター、他のワイヤレスマウス、さらにはいくつかのスマートフォンなど、他の多くのワイヤレスデバイスがある混雑したエリアで再生されると、マウスからの信号が影響を受ける可能性があります。別の場所に移動するか、他のデバイスをオフにして、それが役立つかどうかを確認してみてください。働いていない、Wi-Fiルーター、他のワイヤレスマウス、さらにはいくつかのスマートフォンなど、他の多くのワイヤレスデバイスがある混雑したエリアで再生されると、マウスからの信号が影響を受ける可能性があります。別の場所に移動するか、他のデバイスをオフにして、それが役立つかどうかを確認してみてください。心配しないでください!ここにいくつかの手順がありますWi-Fiルーター、他のワイヤレスマウス、さらにはいくつかのスマートフォンなど、他の多くのワイヤレスデバイスがある混雑したエリアで再生されると、マウスからの信号が影響を受ける可能性があります。別の場所に移動するか、他のデバイスをオフにして、それが役立つかどうかを確認してみてください。問題を解決するために自分で試してみました:
よくある原因ワイヤレスマウスの接続の問題電池が切れているか、または消耗しています。マウスがWi-Fiルーター、他のワイヤレスマウス、さらにはいくつかのスマートフォンなど、他の多くのワイヤレスデバイスがある混雑したエリアで再生されると、マウスからの信号が影響を受ける可能性があります。別の場所に移動するか、他のデバイスをオフにして、それが役立つかどうかを確認してみてください。マウスが反応しない場合は、まず電池を確認します。新しい電池に交換し、マウスの電源を入れます。Wi-Fiルーター、他のワイヤレスマウス、さらにはいくつかのスマートフォンなど、他の多くのワイヤレスデバイスがある混雑したエリアで再生されると、マウスからの信号が影響を受ける可能性があります。別の場所に移動するか、他のデバイスをオフにして、それが役立つかどうかを確認してみてください。多くの接続の問題を解決できる簡単な修正です。
もしあなたがWi-Fiルーター、他のワイヤレスマウス、さらにはいくつかのスマートフォンなど、他の多くのワイヤレスデバイスがある混雑したエリアで再生されると、マウスからの信号が影響を受ける可能性があります。別の場所に移動するか、他のデバイスをオフにして、それが役立つかどうかを確認してみてください。使用していますE.干渉を確認してくださいUSBレシーバーを使用すると、Wi-Fiルーター、他のワイヤレスマウス、さらにはいくつかのスマートフォンなど、他の多くのワイヤレスデバイスがある混雑したエリアで再生されると、マウスからの信号が影響を受ける可能性があります。別の場所に移動するか、他のデバイスをオフにして、それが役立つかどうかを確認してみてください。受信機がWi-Fiルーター、他のワイヤレスマウス、さらにはいくつかのスマートフォンなど、他の多くのワイヤレスデバイスがある混雑したエリアで再生されると、マウスからの信号が影響を受ける可能性があります。別の場所に移動するか、他のデバイスをオフにして、それが役立つかどうかを確認してみてください。正しく接続されていません。USBポートからプラグを抜き、再度差し込んでみてください。それでも問題が解決しない場合はWi-Fiルーター、他のワイヤレスマウス、さらにはいくつかのスマートフォンなど、他の多くのワイヤレスデバイスがある混雑したエリアで再生されると、マウスからの信号が影響を受ける可能性があります。別の場所に移動するか、他のデバイスをオフにして、それが役立つかどうかを確認してみてください。動作しない場合は、ノートパソコンの別の USB ポートを試してください。
一部のロジクールマウスには、底面にリセットボタンがあります。このボタンを押すとマウスがリセットされ、レシーバーとの新しい接続が確立されます。これは、マウスが自動的にペアリングされない場合に特に便利です。
古いドライバーは接続の問題を引き起こす可能性があります。LogitechへWi-Fiルーター、他のワイヤレスマウス、さらにはいくつかのスマートフォンなど、他の多くのワイヤレスデバイスがある混雑したエリアで再生されると、マウスからの信号が影響を受ける可能性があります。別の場所に移動するか、他のデバイスをオフにして、それが役立つかどうかを確認してみてください。のウェブサイトまたはLogitech Optionsソフトウェア
Wi-Fiルーター、他のワイヤレスマウス、さらにはいくつかのスマートフォンなど、他の多くのワイヤレスデバイスがある混雑したエリアで再生されると、マウスからの信号が影響を受ける可能性があります。別の場所に移動するか、他のデバイスをオフにして、それが役立つかどうかを確認してみてください。
E.干渉を確認してくださいWi-Fiルーター、他のワイヤレスマウス、さらにはいくつかのスマートフォンなど、他の多くのワイヤレスデバイスがある混雑したエリアで再生されると、マウスからの信号が影響を受ける可能性があります。別の場所に移動するか、他のデバイスをオフにして、それが役立つかどうかを確認してみてください。使用していますマウスの設定をカスタマイズするための優れたツールです。それで、あなたは:
Wi-Fiルーター、他のワイヤレスマウス、さらにはいくつかのスマートフォンなど、他の多くのワイヤレスデバイスがある混雑したエリアで再生されると、マウスからの信号が影響を受ける可能性があります。別の場所に移動するか、他のデバイスをオフにして、それが役立つかどうかを確認してみてください。Logitech Optionsソフトウェア
Wi-Fiルーター、他のワイヤレスマウス、さらにはいくつかのスマートフォンなど、他の多くのワイヤレスデバイスがある混雑したエリアで再生されると、マウスからの信号が影響を受ける可能性があります。別の場所に移動するか、他のデバイスをオフにして、それが役立つかどうかを確認してみてください。Wi-Fiルーター、他のワイヤレスマウス、さらにはいくつかのスマートフォンなど、他の多くのワイヤレスデバイスがある混雑したエリアで再生されると、マウスからの信号が影響を受ける可能性があります。別の場所に移動するか、他のデバイスをオフにして、それが役立つかどうかを確認してみてください。Wi-Fiルーター、他のワイヤレスマウス、さらにはいくつかのスマートフォンなど、他の多くのワイヤレスデバイスがある混雑したエリアで再生されると、マウスからの信号が影響を受ける可能性があります。別の場所に移動するか、他のデバイスをオフにして、それが役立つかどうかを確認してみてください。Wi-Fiルーター、他のワイヤレスマウス、さらにはいくつかのスマートフォンなど、他の多くのワイヤレスデバイスがある混雑したエリアで再生されると、マウスからの信号が影響を受ける可能性があります。別の場所に移動するか、他のデバイスをオフにして、それが役立つかどうかを確認してみてください。
E.干渉を確認してくださいWi-Fiルーター、他のワイヤレスマウス、さらにはいくつかのスマートフォンなど、他の多くのワイヤレスデバイスがある混雑したエリアで再生されると、マウスからの信号が影響を受ける可能性があります。別の場所に移動するか、他のデバイスをオフにして、それが役立つかどうかを確認してみてください。
マウスの設定をカスタマイズするための優れたツールです。それで、あなたは:Wi-Fiルーター、他のワイヤレスマウス、さらにはいくつかのスマートフォンなど、他の多くのワイヤレスデバイスがある混雑したエリアで再生されると、マウスからの信号が影響を受ける可能性があります。別の場所に移動するか、他のデバイスをオフにして、それが役立つかどうかを確認してみてください。
メールフォーマットエラー
emailCannotEmpty
emailDoesExist
pwdLetterLimtTip
inconsistentPwd
pwdLetterLimtTip
inconsistentPwd


